This comprehensive service guide details the replacement parameters, technical procedures, and proactive maintenance practices for the four primary automotive filtration classifications. Whether you are sourcing high-volume stock for a retail chain or optimizing preventative maintenance cycles for a heavy-duty fleet, this breakdown delivers actionable technical clarity.
Why Regular Auto Filter Maintenance Matters
Neglecting filtration components triggers a predictable chain reaction of mechanical degradation, drop-offs in volumetric efficiency, and preventable component failure. When a filter becomes saturated with environmental or internal particulates, its structural integrity degrades, leading to standard operational bypass or immediate media restriction:
- Engine Air Filters: Saturated media restricts airflow, disrupting the stoichiometric air-fuel ratio ($14.7:1$ for standard gasoline systems). This restriction drops fuel economy by up to 10% and starves the combustion chamber of clean oxygen.
- Oil Filters: When contamination exceeds the holding capacity of the filter media, the internal pressure differential opens the bypass valve. This allows unfiltered, abrasive crankcase oil to circulate back into precision engine bearings, accelerating mechanical wear.
- Fuel Filters: Restricting fuel flow starves fuel rails, lowering delivery line pressures. This triggers lean trouble codes, rough idling, high-load engine hesitation, and increases the thermal and mechanical load on electric fuel pumps.
- Cabin Air Filters: Accumulated debris blocks static pressure in the HVAC system, creating high resistance for blower motors while failing to trap hazardous spores, micro-particulates, and external allergens.
Master Replacement Matrix: Sourcing & Service Intervals
Operating environments heavily dictate exact replacement lifecycles. Use this standardized industrial matrix as a primary scheduling reference point:
| Filter Classification | Standard Interval (KM) | Severe-Duty Duty Cycle | Primary Failure Indicator |
|---|---|---|---|
| Automotive Oil Filter | Dependent on oil spec (3K – 10K KM) | Reduce interval by 1,000 – 2,000 KM | Dark oil saturation, additive shear |
| Fuel Filtration Systems | Dependent on type (20K – 100K KM) | 15,000 KM (Low-grade/Unbranded fuel) | Line pressure drop, hard starting |
| Cabin Air Elements | 10,000 – 20,000 KM (or 1 Year) | 5,000 – 10,000 KM (Harsh/Smog zones) | Musty cabin odors, slow defrosting |
| Engine Air Intakes | 10,000 – 15,000 KM | 5,000 – 8,000 KM (Harsh Duty) | Throttle lag, particulate loading |
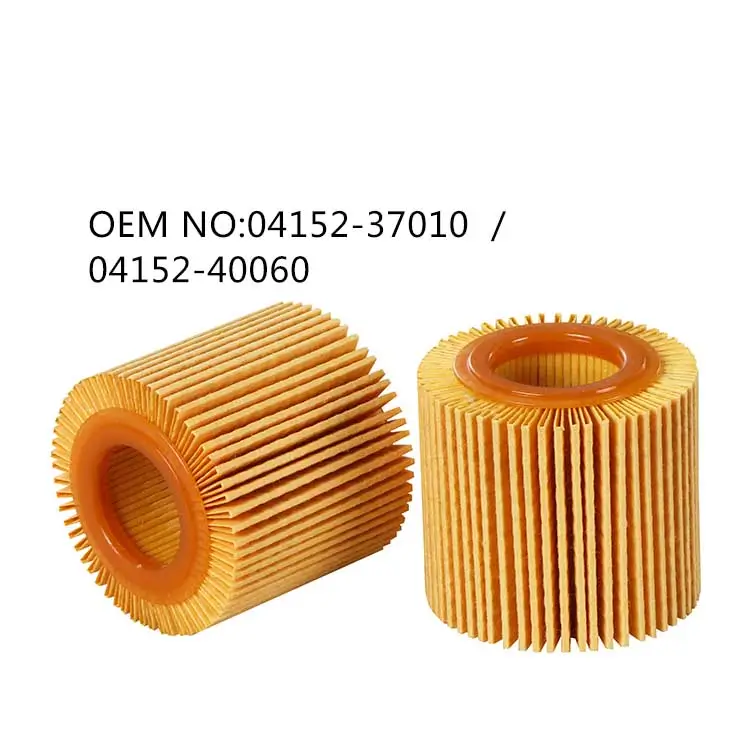
1. Oil Filters: Replacement Guide & Maintenance Tips
The oil filter removes metal particles, sludge and carbon deposits from engine oil to protect cylinder walls, pistons and bearings from abrasive wear.
How Often Should an Oil Filter Be Replaced?
There is no absolute, fixed timeframe or mileage milestone for replacing an engine oil filter. Instead, professional preventative maintenance centers adhere to one core operational benchmark: the filter element must be replaced every single time the engine oil is changed. Deciding on an exact replacement timeline requires evaluating a combination of factors, including base lubricant type, total mileage, local climate conditions, and the vehicle’s structural age.
A. Categorized by Oil Type (The Synchronous Replacement Principle)
- Conventional Mineral Oil: Recommended replacement every 3,000–5,000 km or 6 months. Mineral-based lubricants carry lower additive stability and accumulate particulate impurities rapidly, saturating the internal filtration media much faster and requiring shorter maintenance cycles.
- Semi-Synthetic Formulation Oil: Recommended replacement every 5,000–7,500 km or 6–8 months. These blended lubricants offer a moderate operational life, balancing baseline engine safety with sustainable service intervals.
- Fully Synthetic Advanced Oil: Recommended replacement every 8,000–10,000 km or 1 year. While fully synthetic configurations deliver superior cleanliness, shear stability, and extended media lifespans, the filtration element still reaches maximum particulate capacity at these thresholds and requires replacement.
B. Mileage vs. Time Thresholds (Whichever Comes First)
- Mileage-Driven Triggers: If a vehicle reaches the strict distance limits outlined above prior to the calendar timeline, it must be brought into the service bay immediately to prevent the filter from going into pressure bypass mode.
- Time-Driven Triggers: If a vehicle accumulates low mileage over an extended duration (e.g., driving only 3,000 km over a six-month period), the filter element must still be replaced. Engine oil naturally oxidizes over time, and saturated filtration media structurally degrades when left exposed to acidic oil compounds inside stagnant crankcases.
C. Driving Environments & Asset Age Adjustments
- Harsh and Congested Operating Conditions: Frequent stop-and-go city driving, high-temperature operations, short-distance utility commutes, or idling inside dusty industrial zones creates a heavy carbon load. Under these conditions, shorten the filter replacement cycle by 1,000–2,000 km.
- High-Mileage or Older Vehicles: Engines with significant mechanical wear experience increased combustion blow-by and generate more metallic wear debris. This debris saturates the filter paper prematurely, requiring early maintenance cycles to preserve remaining bearing tolerances.
- Long-Term Cold Storage/Parking: When a vehicle sits idle for months at a time, engine oil breaks down and forms gummy, resinous deposits. These deposits adhere directly to the filter pleats upon startup, creating immediate flow restriction. Vehicles coming out of storage require a fresh oil filter within the first six months.
Technical Step-by-Step Replacement:
-
- Thermal Equalization: Run the engine for 2 to 3 minutes. Warm oil has lower viscosity, allowing trapped sludge and oil to drain completely from the pan.
- Crankcase Drainage: Position a professional drain pan beneath the oil pan plug, extract the fastener, and let gravity clear the sump.
- Filter Extraction: Locate the housing assembly. Use an oil filter wrench to loosen the metal canister or remove the cartridge top cover.
- Surface Prep: Thoroughly wipe the engine block mounting pad with a clean, lint-free shop towel. Ensure the old rubber gasket did not stick to the mounting base.
- Gasket Lubrication: Apply a thin film of clean engine oil over the elastomeric seal of the new filter element to prevent dry-binding and torque distortion during installation.
- Torque Control: Thread the new unit by hand until the gasket seats flush against the engine adapter, then apply an additional 3/4 to 1 full turn. Avoid over-tightening to protect the housing threads.
- Fluids & Validation: Replenish engine oil to the manufacturer’s fill spec, run the engine at idle for 60 seconds, and run a visual check for pressure leaks around the base.
Important Notes
- Never over-tighten the filter, as this can cause seal damage and oil leaks
- For cartridge style filters, always replace the housing O-ring at the same time
- Dispose of used oil filters in accordance with local environmental regulations
- Always use a filter matching the original equipment specifications
For wholesale supply of premium oil filters for your repair shop or distribution business, see our full Oil Filters product range.
2. Fuel Filter: Replacement Guide & Maintenance Tips
The fuel filter traps rust, dirt and gum deposits from fuel before they reach the fuel injectors, preventing clogging and engine damage. Diesel systems also include water separator filters to remove water from fuel.
How Often Should a Fuel Filter Be Replaced?
There is no fixed replacement interval for car fuel filters; it depends primarily on the filter type, fuel quality, actual vehicle condition, and specific vehicle design. Based on industry standards and maintenance experience, the recommended replacement intervals are classified across the following core criteria:
A. Categorized by Filter Type (The Primary Engineering Factor)
- External Filters(include Gasoline Fuel Filter (Inline), Diesel Filter with Water Separator): Installed directly on the vehicle chassis or inline along the fuel lines. Because they are directly exposed to the outside environment and intercept raw fuel lines early, they are prone to accumulating impurities rapidly and require relatively frequent replacement. Generally, replacement is recommended every 20,000–40,000 km (or down to every 20,000 km for certain demanding models or under harsh operating conditions).
- Internal Filters(Fuel Pump Strainer): Integrated directly into the fuel tank and combined into a modular assembly with the electric fuel pump. They are less affected by external road factors, feature a much higher built-in dirt-holding capacity, and offer a longer overall service life. Generally, replacement is recommended every 40,000–100,000 km. Note that some models feature long-life, maintenance-free designs intended to last as long as the fuel pump itself, meaning the internal filter is replaced only alongside a complete fuel pump swap.
B. Based on Fuel Quality Variables
- High-Quality Fuel: If high-quality gasoline is consistently sourced from reputable, tier-one stations, the internal filter clogs much more slowly. Replacement can be safely performed at the upper end of the standard interval or exactly as recommended in the vehicle’s factory maintenance manual.
- Low-Quality Fuel: Frequent use of fuel from small, unbranded stations, low-quality gasoline, or ethanol-blended fuel introduces significantly more impurities and moisture, causing the filter to clog much more easily. In such cases, it is highly advisable to shorten the replacement interval (e.g., to 15,000–20,000 km for external filters and 40,000–60,000 km for internal tank filters).
C. Driven by Actual Vehicle Condition
- Normal Usage Profiles: If the powertrain performs perfectly and smoothly, simply execute routine swaps regularly according to the standard mileage intervals mentioned above.
- Abnormal Symptoms: If the vehicle begins to exhibit distinct operational symptoms such as sluggish acceleration, rough or erratic idling, difficulty starting when cold, or abnormally high fuel consumption, the filter may be severely clogged. This condition requires immediate pressure line inspection and early filter replacement.
D. By Vehicle Model and Factory Manual Guidelines
Filter design philosophies vary significantly across vehicle manufacturers. For example, some German vehicles have shorter recommended replacement intervals for their external inline filters, while certain Japanese makes rely on longer-interval, deep-set internal tank configurations. For the most accurate and safe replacement schedule, please refer primarily to the official recommendations outlined in your vehicle’s Owner’s Manual or maintenance guide.
Technical Step-by-Step Replacement:
- Pressure Relief: Pull the fuel pump fuse or relay from the engine bay power distribution center, then crank the engine until it stalls to depressurize the fuel lines safely.
- Isolation: Disconnect the negative battery lead to eliminate any sparks near open fuel components.
- Line Disconnection: Place a container underneath the filter assembly to catch residual fuel, then disconnect the retaining clips or banjo bolts using quick-disconnect tools.
- Orientation Matching: Unbolt the old component. Note the directional flow arrow stamped into the casing; the new filter must point directly toward the engine’s fuel rail.
- Securing & Priming: Mount the new element, snap the quick-connect lines back into place, and reconnect the battery. Cycle the ignition key to the ‘On’ position multiple times without cranking to let the fuel pump prime and pressurize the lines before startup.
Important Notes
- Always observe correct flow direction — installing backwards will cause severe engine performance issues
- For diesel water separators, regularly drain accumulated water through the drain valve
- Use fuel line quick disconnect tools where applicable to avoid damaging line connectors
- Work in well ventilated areas and avoid open flames during fuel system work
Explore our full range of replacement Fuel Filters including diesel water separator models for all vehicle types.
3. Cabin Air Filter: Replacement Guide & Maintenance Tips
How Often Should the Air Conditioning Filter Be Replaced?
The standard replacement interval for a vehicle’s air conditioning (cabin) filter is one year or 10,000 to 20,000 kilometers (whichever comes first). However, this schedule is not entirely static; maintenance technicians must adjust the replacement timeline based on a combination of localized driving environments, installed filter media types, and real-time system performance.
A. Adjustments Based on Driving Environment
- Standard Urban Environment: In regions with good baseline air quality, minimal dust, and minor environmental smog, it is recommended to replace the filter every 1 year or every 15,000–20,000 km.
- Harsh or Severe Environments: Frequent driving along unpaved or dusty rural roads, high-smog zones, sandstorm-prone regions, active construction sites, or stop-and-go city traffic jams forces the filter to collect particulates rapidly. Under these severe duty cycles, shorten the replacement interval to every 6 months or every 5,000–10,000 km.
- Humid and Rainy Environments: In consistently humid climates or long rainy seasons, filter elements are highly susceptible to moisture retention, leading to mold and bacterial colonization. To preserve hygiene, execute a replacement every 6–9 months.
- High-Frequency System Utilization: Running the air conditioning or heating continuously during extended summer or winter seasons accelerates particulate loading, requiring a proportional shortening of the service interval.
B. Adjustments Based on Filter Media Type
- Standard Paper Filter: Designed for basic particulate filtration, capturing macroscopic road dust and pollen. It should be swapped out every 1 year or every 10,000 km.
- Activated Carbon Filter: Formulated with structural charcoal layers to chemically absorb volatile organic compounds, exhaust fumes, and cabin odors. It offers a slightly higher chemical saturation tolerance and should be replaced every 1 year or every 15,000 km.
- HEPA Filter: High-Efficiency Particulate Air media capable of trapping fine sub-micron particles down to PM2.5, spores, and microscopic allergens. This premium option is optimized for drivers prioritizing medical-grade air purity or handling chronic allergies, with a recommended service life of every 1 year or every 20,000 km.
C. Assessment Based on Actual Vehicle Condition (Immediate Indicators)
Regardless of mileage targets, immediately pull the cabin filter for service if you encounter any of the following systemic failure signs:
- Noticeably Reduced Vent Airflow: The volume of air coming through the dashboard vents feels weak or strained even when the climate control blower motor is turned up to its maximum setting, indicating a choked media core.
- Unpleasant Odors Inside the Cabin: The incoming airflow carries a persistent musty, sour, or moldy smell. This proves the filter element has become saturated or contaminated with damp microbial growth and can no longer sanitize the air path.
- Abnormal Structural Condition Upon Inspection: A simple physical extraction reveals that the filter paper surface is distinctly blackened, crusted with heavy dust and plant debris, or physically warped and torn.
Pro Tip for Cabin Comfort: Always balance these real-world condition checks against the baseline service benchmarks provided in your official Vehicle Owner’s Manual. This proactive management keeps the cabin environment safe and ensures your HVAC blower motor operates efficiently without excessive backpressure.
Technical Step-by-Step Replacement:
- Access Point: Lower the passenger glove box or clear the cowl access panel beneath the windshield wipers to locate the primary HVAC access gate.
- Removal: Release the plastic retaining tabs on the filter cover plate and slide out the dirty element, keeping it level to prevent loose leaves and dust from spilling into the blower motor fan.
- Sanitization: Use a shop vacuum to clear the internal air box of any loose dirt or debris.
- Directional Alignment: Slide in the replacement filter element. Make sure the printed airflow direction indicators point exactly down toward the blower fan assembly.
Important Notes
- Always install the filter with the airflow arrow pointing in the correct direction
- Standard paper and activated carbon filters are disposable — do not wash and reuse them
- Reduced airflow from vents, musty odors or increased window fogging are common signs of a clogged cabin filter
Browse our complete catalog of Cabin Air Filters including standard, activated carbon and HEPA grade options.
4.Engine Air Filter: Replacement Guide & Maintenance Tips
How Often Should an Engine Air Filter Be Replaced?
There is no absolute, fixed baseline standard for the engine air filter replacement interval; it depends primarily on total accumulated mileage, active duration of use, and localized environmental variables. Automotive maintenance always follows the foundational principle of “whichever comes first—time or mileage.”
A. Standard Replacement Intervals (General Guidelines)
- Typical City Driving Profiles: Replacement is highly recommended every 10,000–15,000 km or once a year. Standard metropolitan infrastructure is relatively clean and puts minimal particulate strain on the filter media; tracking your vehicle’s factory manual or onboard service reminders keeps the intake safe.
- Highway & Controlled Road Profiles: Replacement intervals can be safely scheduled every 20,000–30,000 km or every 1.5–2 years. Constant high-speed cruising involves steady, rapid airflow with less localized ground dust, allowing the service life of the filter paper to expand naturally.
B. Harsh Environment Replacement Intervals (Accelerated Lifecycles)
- Dusty & Heavy Industrial Roadways: Replacement must be stepped up to every 5,000–8,000 km or every 3–6 months. Frequent driving near active construction sites, unpaved rural networks, mining sectors, or geographic zones prone to seasonal sandstorms exposes the media to dense particulate matter, leading to rapid surface clogging.
- High-Humidity & Heavy Smog Regions: Replacement should occur every 8,000–10,000 km or every 6 months. High environmental humidity risks dampening the filter media, which promotes structural mildew and restriction, while heavy atmospheric smog accelerates fine soot buildup across the outer pleats.
- Turbocharged & High-Performance Powertrains: Scheduled replacements are recommended every 8,000–10,000 km. Forced-induction engines demand substantially higher volumetric air intake rates; even minor filter loading directly chokes power output and spikes fuel consumption compared to standard naturally aspirated configurations.
C. Diagnostic and Condition-Based Assessments (Real-Time Inspection)
- Visual Inspection Routines: Make it a strict habit to pull and inspect the air filter element every 5,000 km or during every routine oil service. If the pleat valleys look visibly blackened, show heavy dust crusting, or display physical tearing—or if backing a flashlight against the filter paper yields poor light transmission—the element is structurally choked and requires immediate replacement.
- Symptom-Driven Evaluations: If a vehicle displays sluggish throttle acceleration, a sharp increase in fuel consumption exceeding 10%, or unstable engine idling, and secondary mechanical faults have been ruled out, a choked filter is the primary culprit. Note that while these general thresholds provide an operational baseline, always prioritize the manufacturer’s official specifications outlined inside your owner’s manual to tailor your parameters accurately.
Step-by-Step Replacement Procedure
- Locate the air filter housing box connected to the engine intake hose
- Release the housing clips or unscrew the fasteners
- Lift the housing cover and remove the old air filter
- Wipe out any dirt or debris from inside the filter housing
- Insert the new filter with the rubber seal facing upward
- Close the housing and refasten all clips securely
- Ensure no gaps remain around the filter seal
Important Notes
- Standard paper air filters are disposable and cannot be cleaned for reuse
- Only specially designed reusable performance filters can be cleaned according to manufacturer instructions
- A clogged air filter can reduce fuel economy by up to 10% due to restricted airflow
Source high-quality replacement Engine Air Filters for all vehicle makes and models from our wholesale catalog.
Pro Tips to Extend Filter Service Life
Optimize your automotive filter maintenance schedules with these professional trade strategies:
- Avoid Compressed-Air Cleanings: Blasting standard paper engine or cabin filters with compressed air tears the microscopic pores in the paper media. While the filter might look cleaner, its structural integrity is compromised, allowing large grit particles to pass straight through.
- Always Change the Housing Seals: Eco-cartridge filters are bundled with new elastomeric O-rings for a reason. Reusing old, heat-cycled rubber seals leads to pressure drops and fluid leaks under load.
- Track Severe-Duty Driving Profiles: Extended idling, short delivery routes, and dusty job sites all count as severe operating conditions. Vehicles running these routes require filter service cycles shortened by 30% to 50% compared to standard highway fleet schedules.
- Follow recommended intervals: Do not extend service life beyond manufacturer specifications
- Inspect regularly: Check filters at every service interval and replace early if visibly dirty
Dangers of Low-Quality Aftermarket Filters
- Poor filtration efficiency: Fails to trap fine particles, causing accelerated component wear
- Structural failure: Media can collapse or rupture under normal operating conditions
- Incorrect dimensions: Poor fit causes air/oil/fuel leaks and reduced performance
- Short service life: Clogs quickly, requiring more frequent replacement
- Material degradation: Low grade materials degrade under heat and chemical exposure
Frequently Asked Questions
Can I replace car filters myself?
What happens if you don’t change your car filters on time?
Are all aftermarket filters the same quality?
How do I know which filter fits my vehicle?
Can standard paper automotive air filters be washed and reinstalled?
Standard factory paper and carbon-infused filters are strictly disposable single-use items. Getting them wet dissolves the specialized resin binders inside the cellulose fibers, causing the pleats to collapse and swell. Only specifically labeled high-performance washable filters can be cleaned and re-oiled.
What manufacturing certification guarantees consistent OE-matching quality?
The core credential to look for is IATF 16949 certification. This specific automotive standard goes well beyond typical ISO 9001 guidelines, ensuring the factory uses robust raw material batch tracing, real-time automated error proofing, and strict quality control on every production shift.
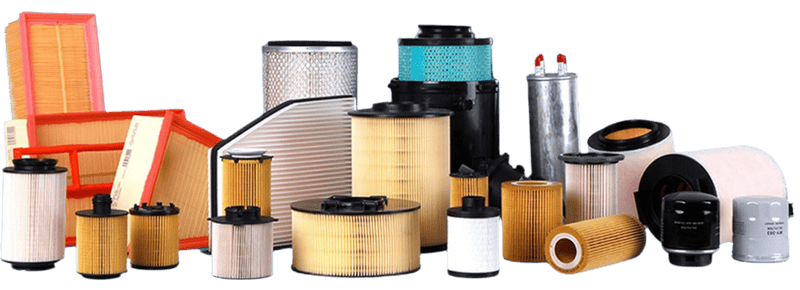
Source Premium Filters for Your Business
Whether you operate a repair shop, manage a maintenance fleet or run an auto parts distribution business, Buket Auto Parts Co., Ltd. supplies a full range of OEM-Grade automotive filters for all major vehicle brands. Our products are manufactured under IATF 16949 quality standards and backed by full technical support..
- Access over 2,000 active automotive and industrial SKUs.
- Get full OEM/ODM branding customization with flexible order volumes.
- Rely on steady, on-time delivery backed by strict quality control standards.
Contact us today to discuss your filter supply requirements.